Java项目:高并发秒杀系统
==============
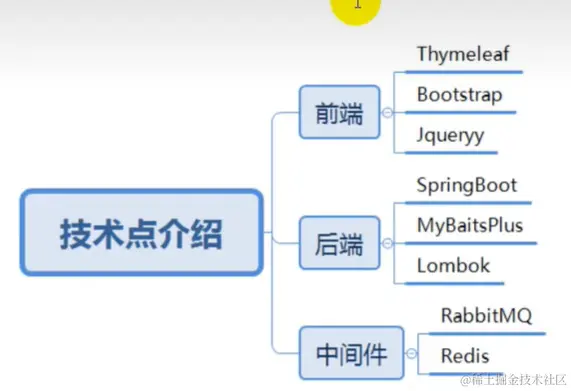

一、搭建项目
1、@MapperScan
- 作用:指定要变成实现类的接口所在的包,然后包下面的所有接口在编译之后都会生成相应的实现类
- 添加位置:是在Springboot启动类上面添加
2、@Controller
- 扫描到带有
@Controller注解的类时,会将其实例化并将其作为处理请求的控制器对象
3、@RequestMapping("/demo")
- 指定控制器中处理请求的映射路径。在这个例子中,
/demo表示��是相对于应用程序的根路径的子路径。当请求的URL与映射路径匹配时,控制器中的相应方法将被调用来处理该请求。
4、@Component
Spring框架中,@Component 是一个通用的注解,用于表示一个类是一个Spring组件,当Spring容器启动时,它会扫描应用程序中带有 @Component 注解的类,并为它们创建相应的实例(Bean)。这样,开发人员就可以通过依赖注入等方式方便地使用这些组件
二、登录
两次MD5加密
第一次:密码从用户端传到后端时,因为密码在网络中传输,防止密码被篡改;
第二次:服务端接到密码存入数据库之前需要进行加密,防止数据库被盗之后密码泄露
代码:MD5Util.java
package com.xxxx.seckill.utils;

import org.apache.commons.codec.digest.DigestUtils;
import org.springframework.stereotype.Component;

//MD5工具类
@Component
public class MD5Util {
    public static String md5(String src){
        return DigestUtils.md5Hex(src);
    }

    private static final String salt="1a2b3c4d";//和前端的salt进行统一,因为第一次加密是在前端加密的

    public static String inputPassToFromPass(String inputPass){//这个加密在前端就完成了
        String str=""+salt.charAt(0)+salt.charAt(2)+inputPass+salt.charAt(5)+salt.charAt(4);
        return md5(str);
    }

    public static String fromPassToDBPass(String fromPass,String salt){
        //这个salt是二次加密的salt,可以是随机的salt
        String str=""+salt.charAt(0)+salt.charAt(2)+fromPass+salt.charAt(5)+salt.charAt(4);
        return md5(str);
    }

    public static String inputPassToDBPass(String inputPass,String salt){
        String fromPass = inputPassToFromPass(inputPass);
        String dbPass = fromPassToDBPass(fromPass, salt);
        return dbPass;
    }

    public static void main(String[] args) {
        System.out.println(inputPassToFromPass("123456"));
        System.out.println(fromPassToDBPass("d3b1294a61a07da9b49b6e22b2cbd7f9","1a2b3c4d"));
    }
}
逆向工程
生成实体类,接口等代码模板
页面跳转
@RestController:这是一个Spring Framework的注解,用于将类标记为RESTful风格的控制器。它是@Controller和@ResponseBody两个注解的组合,它表示该类中的方法将返回RESTful风格的响应数据。
*问题*:`@RestController`和`@Controller`的区别是啥
(1)响应处理方式:
    @Controller: 该注解标记的控制器类中的方法默认返回的是视图名称,需要配合@ResponseBody注解才能返回响应数据。
    @RestController: 该注解标记的控制器类中的方法默认会将返回值直接序列化为响应体,不需要额外使用@ResponseBody注解。
(2)继承关系:
  `@RestController`实际上是`@Controller`和`@ResponseBody`两个注解的组合。
  `@RestController`继承了`@Controller`的功能,并且自动添加了`@ResponseBody`。
@RequestMapping("/login"):这是一个Spring Framework的注解,用于映射请求路径到控制器的方法。在这个例子中,它将所有以”/login”开头的请求映射到该控制器类的方法上,实现与”/login”相关的处理逻辑。当客户端发送一个以 “/login” 开头的请求时,该请求将被映射到LoginController类中的相应方法进行处理@Slf4j:这是一个Lombok库的注解,用于自动生成一个名为”log”的日志记录器。通过使用该注解,我们可以在类中直接使用”log”对象来进行日志记录,而无需手动创建日志记录器。@ResponseBody注解能够让Controller方法直接将数据写入HTTP响应,而不需要经过视图解析器,对于RESTful API开发非常有用
登录
@Autowired
private IUserService iUserService;
-   `@Autowired` 注解会自动在Spring容器中查找类型匹配的Bean,然后将其注入到被注解的字段或者方法中。
-   这样可以避免手动编写繁琐的`new`操作来创建对象实例。
自定义注解参数校验
1、添加依赖-validation组件
<dependency>
    <groupId>org.springframework.boot</groupId>
    <artifactId>spring-boot-starter-validation</artifactId>
</dependency>
2、添加@Valid注解
public RespBean doLogin(@Valid LoginVo loginVo){
        return userService.doLogin(loginVo);
    }
3、在pojo类上添加注解@NotNull @isMobile
@Data
public class LoginVo {
    @NotNull
    @isMobile
    private String mobile;

    @NotNull
    @Length(min=32)
    private String password;
}
4、自定义注解@isMobile
package com.xxxx.seckill.validator;

import com.xxxx.seckill.vo.isMobileValidator;

import javax.validation.Constraint;
import javax.validation.Payload;
import javax.validation.constraints.NotNull;
import java.lang.annotation.*;

@Target({ElementType.METHOD, ElementType.FIELD, ElementType.ANNOTATION_TYPE, ElementType.CONSTRUCTOR, ElementType.PARAMETER, ElementType.TYPE_USE})
@Retention(RetentionPolicy.RUNTIME)
@Documented
@Constraint(//定义一个校验的规则的类
        validatedBy = { isMobileValidator.class}
)
//验证手机号是否正确
public @interface isMobile {
    boolean required() default true;

    String message() default "手机号格式不正确";//报错的消息

    Class<?>[] groups() default {};

    Class<? extends Payload>[] payload() default {};
}
5、自定义isMobile的规则 isMobileValidator
package com.xxxx.seckill.vo;

import com.xxxx.seckill.utils.ValidatorUtil;
import com.xxxx.seckill.validator.isMobile;
import org.thymeleaf.util.StringUtils;

import javax.validation.ConstraintValidator;
import javax.validation.ConstraintValidatorContext;

public class isMobileValidator implements ConstraintValidator<isMobile, String> {

    private boolean required=false;//获取是否是必填

    @Override
    public void initialize(isMobile constraintAnnotation) {
        required=constraintAnnotation.required();//获取是否是必填
    }

    @Override
    public boolean isValid(String value, ConstraintValidatorContext constraintValidatorContext) {
        if(required){//如果是必填
            return ValidatorUtil.isMobile(value);
        }else{//如果不是必填
            if(StringUtils.isEmpty(value)){
                return true;
            }else{
                return ValidatorUtil.isMobile(value);
            }
        }
    }
}
6、自定义手机号校验的逻辑
//手机号码校验
public class ValidatorUtil {
    private static final Pattern moblie_pattern= Pattern.compile("[1]([3-9])[0-9]{9}$");

    public static boolean isMobile(String mobile){
        if(StringUtils.isEmpty(mobile))
            return false;
        Matcher matcher=moblie_pattern.matcher(mobile);
        return matcher.matches();
    }
}
异常处理
问题:抛出异常只能在后端显示,无法在前端显示(本项目使用了两个注解的方法)
创建类:GlobalException和GlobalExceptionHandler
1、`@RestControllerAdvice`
它用于定义一个全局的异常处理器。当一个Spring MVC应用程序中的控制器方法(被`@RestController`注解的方法)抛出异常时,`@RestControllerAdvice`注解的类中的方法就会被调用,以处理这些异常。
2、`@ExceptionHandler(Exception.class)`
被注解的方法会成为全局异常处理方法,用于处理控制器中抛出的所有 `Exception` 类型及其子类型的异常
package com.xxxx.seckill.exception;

import com.xxxx.seckill.vo.RespBean;
import com.xxxx.seckill.vo.RespBeanEnum;
import org.springframework.validation.BindException;
import org.springframework.web.bind.annotation.ExceptionHandler;
import org.springframework.web.bind.annotation.RestControllerAdvice;

@RestControllerAdvice
public class GlobalExceptionHandler {

    @ExceptionHandler(Exception.class)
    public RespBean ExceptionHandler(Exception e){
        if(e instanceof GlobalException){
            GlobalException ex=(GlobalException) e;
            return RespBean.error(ex.getRespBeanEnum());
        }else if(e instanceof BindException){
            BindException ex=(BindException) e;
            RespBean respBean=RespBean.error(RespBeanEnum.BIND_ERROR);
            respBean.setMessage("参数异常:"+ex.getBindingResult().getAllErrors().get(0).getDefaultMessage());
            return respBean;
        }
        return RespBean.error(RespBeanEnum.ERROR);
    }

}
@Data
@AllArgsConstructor
@NoArgsConstructor
public class GlobalException extends RuntimeException{
    private RespBeanEnum respBeanEnum;
}
完善登录功能
生成cookie,把cookie和用户对象保存到session中
分布式 session :在一个分布式系统中,用户可能会在不同的服务器上访问应用程序,因此需要一种机制来保持用户的登录状态并在多个服务器之间共享会话数据。
分布式 Cache 管理:利用分布式缓存系统(如 Redis 或 Memcached)来存储和共享会话数据。这种方式可以提高系统的可扩展性和可用性,但需要考虑缓存的一致性和故障恢复。
使用SpringSession处理;
准备工具类CookieUtil
package com.xxxx.seckill.utils;

import javax.servlet.http.Cookie;
import javax.servlet.http.HttpServletRequest;
import javax.servlet.http.HttpServletResponse;
import java.io.UnsupportedEncodingException;
import java.net.URLDecoder;
import java.net.URLEncoder;

/**
 * Cookie工具类
 *
 * @author: LC
 * @date 2022/3/2 5:48 下午
 * @ClassName: CookieUtil
 */
public final class CookieUtil {

    /**
     * 得到Cookie的值, 不编码
     *
     * @param request
     * @param cookieName
     * @return
     */
    public static String getCookieValue(HttpServletRequest request, String cookieName) {
        return getCookieValue(request, cookieName, false);
    }

    /**
     * 得到Cookie的值,
     *
     * @param request
     * @param cookieName
     * @return
     */
    public static String getCookieValue(HttpServletRequest request, String cookieName, boolean isDecoder) {
        Cookie[] cookieList = request.getCookies();
        if (cookieList == null || cookieName == null) {
            return null;
        }
        String retValue = null;
        try {
            for (int i = 0; i < cookieList.length; i++) {
                if (cookieList[i].getName().equals(cookieName)) {
                    if (isDecoder) {
                        retValue = URLDecoder.decode(cookieList[i].getValue(), "UTF-8");
                    } else {
                        retValue = cookieList[i].getValue();
                    }
                    break;
                }
            }
        } catch (UnsupportedEncodingException e) {
            e.printStackTrace();
        }
        return retValue;
    }

    /**
     * 得到Cookie的值,
     *
     * @param request
     * @param cookieName
     * @return
     */
    public static String getCookieValue(HttpServletRequest request, String cookieName, String encodeString) {
        Cookie[] cookieList = request.getCookies();
        if (cookieList == null || cookieName == null) {
            return null;
        }
        String retValue = null;
        try {
            for (int i = 0; i < cookieList.length; i++) {
                if (cookieList[i].getName().equals(cookieName)) {
                    retValue = URLDecoder.decode(cookieList[i].getValue(), encodeString);
                    break;
                }
            }
        } catch (UnsupportedEncodingException e) {
            e.printStackTrace();
        }
        return retValue;
    }

    /**
     * 设置Cookie的值 不设置生效时间默认浏览器关闭即失效,也不编码
     */
    public static void setCookie(HttpServletRequest request, HttpServletResponse response, String cookieName,
                                 String cookieValue) {
        setCookie(request, response, cookieName, cookieValue, -1);
    }

    /**
     * 设置Cookie的值 在指定时间内生效,但不编码
     */
    public static void setCookie(HttpServletRequest request, HttpServletResponse response, String cookieName,
                                 String cookieValue, int cookieMaxage) {
        setCookie(request, response, cookieName, cookieValue, cookieMaxage, false);
    }

    /**
     * 设置Cookie的值 不设置生效时间,但编码
     */
    public static void setCookie(HttpServletRequest request, HttpServletResponse response, String cookieName,
                                 String cookieValue, boolean isEncode) {
        setCookie(request, response, cookieName, cookieValue, -1, isEncode);
    }

    /**
     * 设置Cookie的值 在指定时间内生效, 编码参数
     */
    public static void setCookie(HttpServletRequest request, HttpServletResponse response, String cookieName,
                                 String cookieValue, int cookieMaxage, boolean isEncode) {
        doSetCookie(request, response, cookieName, cookieValue, cookieMaxage, isEncode);
    }

    /**
     * 设置Cookie的值 在指定时间内生效, 编码参数(指定编码)
     */
    public static void setCookie(HttpServletRequest request, HttpServletResponse response, String cookieName,
                                 String cookieValue, int cookieMaxage, String encodeString) {
        doSetCookie(request, response, cookieName, cookieValue, cookieMaxage, encodeString);
    }

    /**
     * 删除Cookie带cookie域名
     */
    public static void deleteCookie(HttpServletRequest request, HttpServletResponse response,
                                    String cookieName) {
        doSetCookie(request, response, cookieName, "", -1, false);
    }

    /**
     * 设置Cookie的值,并使其在指定时间内生效
     *
     * @param cookieMaxage cookie生效的最大秒数
     */
    private static final void doSetCookie(HttpServletRequest request, HttpServletResponse response,
                                          String cookieName, String cookieValue, int cookieMaxage, boolean isEncode) {
        try {
            if (cookieValue == null) {
                cookieValue = "";
            } else if (isEncode) {
                cookieValue = URLEncoder.encode(cookieValue, "utf-8");
            }
            Cookie cookie = new Cookie(cookieName, cookieValue);
            if (cookieMaxage > 0)
                cookie.setMaxAge(cookieMaxage);
            if (null != request) {// 设置域名的cookie
                String domainName = getDomainName(request);
                System.out.println(domainName);
                if (!"localhost".equals(domainName)) {
                    cookie.setDomain(domainName);
                }
            }
            cookie.setPath("/");
            response.addCookie(cookie);
        } catch (Exception e) {
            e.printStackTrace();
        }
    }

    /**
     * 设置Cookie的值,并使其在指定时间内生效
     *
     * @param cookieMaxage cookie生效的最大秒数
     */
    private static final void doSetCookie(HttpServletRequest request, HttpServletResponse response,
                                          String cookieName, String cookieValue, int cookieMaxage, String encodeString) {
        try {
            if (cookieValue == null) {
                cookieValue = "";
            } else {
                cookieValue = URLEncoder.encode(cookieValue, encodeString);
            }
            Cookie cookie = new Cookie(cookieName, cookieValue);
            if (cookieMaxage > 0) {
                cookie.setMaxAge(cookieMaxage);
            }
            if (null != request) {// 设置域名的cookie
                String domainName = getDomainName(request);
                System.out.println(domainName);
                if (!"localhost".equals(domainName)) {
                    cookie.setDomain(domainName);
                }
            }
            cookie.setPath("/");
            response.addCookie(cookie);
        } catch (Exception e) {
            e.printStackTrace();
        }
    }

    /**
     * 得到cookie的域名
     */
    private static final String getDomainName(HttpServletRequest request) {
        String domainName = null;
        // 通过request对象获取访问的url地址
        String serverName = request.getRequestURL().toString();
        if (serverName == null || serverName.equals("")) {
            domainName = "";
        } else {
            // 将url地下转换为小写
            serverName = serverName.toLowerCase();
            // 如果url地址是以http://开头  将http://截取
            if (serverName.startsWith("http://")) {
                serverName = serverName.substring(7);
            }
            int end = serverName.length();
            // 判断url地址是否包含"/"
            if (serverName.contains("/")) {
                //得到第一个"/"出现的位置
                end = serverName.indexOf("/");
            }

            // 截取
            serverName = serverName.substring(0, end);
            // 根据"."进行分割
            final String[] domains = serverName.split("\\.");
            int len = domains.length;
            if (len > 3) {
                // www.xxx.com.cn
                domainName = domains[len - 3] + "." + domains[len - 2] + "." + domains[len - 1];
            } else if (len <= 3 && len > 1) {
                // xxx.com or xxx.cn
                domainName = domains[len - 2] + "." + domains[len - 1];
            } else {
                domainName = serverName;
            }
        }

        if (domainName != null && domainName.indexOf(":") > 0) {
            String[] ary = domainName.split("\\:");
            domainName = ary[0];
        }
        return domainName;
    }
}
Redis操作命令:
String:
set name sweet
mset name sweet addr shanghai hobby music
mget name addr hobby
Hash:
hset user name sweet
hget user name
hmset user name sweet age 24 home shanxi
hmget user name age home
hgetall user
List:
lpush students zhangsan lisi
rpush students wangwu zhaoliu
lrange students 0 3
llen students
lrem student 1 lisi//删除student list中一个lisi
Set
sadd letters aaa bbb ccc ddd
smembers letters
scard letters
srem letters aaa
set code test ex 10//设置失效时间为10m
ttl code
set code test nx//在code不存在的情况下才能设置成功
set code test xx//在code存在的情况下也能设置成功
解决分布式session:1、springsession;2、redis存储用户信息
Redis存储用户信息,优化分布式session问题:
不做任何操作,存入redis的数据是二进制的,因为存入的是用户对象,最好进行序列化;
@Configuration 是 Spring 框架中一个非常重要的注解,它主要用于定义配置类。配置类通常用于替代 XML 配置文件,提供 Bean 的定义和配置信息。使用@Configuration 注解的类会被 Spring 容器识别为配置类,并由容器负责管理其中定义的 Bean;
编写RedisConfig,public User getUserByCookie(String userTicket,HttpServletRequest request,HttpServletResponse response)
RedisConfig:
package com.xxxx.seckill.config;

import org.springframework.context.annotation.Bean;
import org.springframework.context.annotation.Configuration;
import org.springframework.data.redis.connection.RedisConnectionFactory;
import org.springframework.data.redis.core.RedisTemplate;
import org.springframework.data.redis.serializer.GenericJackson2JsonRedisSerializer;
import org.springframework.data.redis.serializer.StringRedisSerializer;

/**
 * redis配置类,实现序列化
 */
@Configuration
public class RedisConfig {
    @Bean
    public RedisTemplate<String,Object> redisTemplate(RedisConnectionFactory redisConnectionFactory){
        RedisTemplate<String, Object> redisTemplate = new RedisTemplate<>();
        redisTemplate.setKeySerializer(new StringRedisSerializer());//设置redis的key的序列化
        redisTemplate.setValueSerializer(new GenericJackson2JsonRedisSerializer());//设置redis的value的序列化
        redisTemplate.setHashKeySerializer(new StringRedisSerializer());//设置哈希key的序列化
        redisTemplate.setHashValueSerializer(new GenericJackson2JsonRedisSerializer());//设置哈希value的序列化


        //注入连接工厂
        redisTemplate.setConnectionFactory(redisConnectionFactory);
        return redisTemplate;
    }
}
getUserByCookie:
@Override
    public User getUserByCookie(String userTicket,HttpServletRequest request,HttpServletResponse response) {
        if(StringUtils.isEmpty(userTicket)){
            return null;
        }
        User user = (User) redisTemplate.opsForValue().get("user:" + userTicket);
        if(user !=null){
            CookieUtil.setCookie(request,response,userTicket,userTicket);//重新设置cookie:为了让客户端中的数据和redis缓存中的数据保持一致
        }
        return user;
    }
优化登录功能,在子功能前进行对象判定:
现有问题:登陆之后的每一步操作都要判断用户是否登录(判断是否有ticket,再通过ticket获取用户信息),这个过程太麻烦了
解决方法:给每个子功能传参时只传User对象,对于User对象的判定在传参之前操作;
自定义用户参数:UserArgumentResolver,并对参数进行判断
UserArgumentResolver:
package com.xxxx.seckill.config;

import com.xxxx.seckill.pojo.User;
import com.xxxx.seckill.service.IUserService;
import com.xxxx.seckill.utils.CookieUtil;
import org.springframework.beans.factory.annotation.Autowired;
import org.springframework.context.annotation.Configuration;
import org.springframework.core.MethodParameter;
import org.springframework.stereotype.Component;
import org.springframework.web.bind.support.WebDataBinderFactory;
import org.springframework.web.context.request.NativeWebRequest;
import org.springframework.web.method.support.HandlerMethodArgumentResolver;
import org.springframework.web.method.support.ModelAndViewContainer;
import org.thymeleaf.util.StringUtils;

import javax.servlet.http.HttpServletRequest;
import javax.servlet.http.HttpServletResponse;

/**
 * 自定义用户参数
 */
@Component
public class UserArgumentResolver implements HandlerMethodArgumentResolver {
    @Autowired
    private IUserService userService;
    /**
     * 满足supportsParameter才会继续执行resolveArgument
     * @param parameter
     * @return
     */
    @Override
    public boolean supportsParameter(MethodParameter parameter) {
        Class<?> clazz = parameter.getParameterType();
        return clazz == User.class;//参数的类型是User类型
    }

    @Override
    public Object resolveArgument(MethodParameter methodParameter, ModelAndViewContainer modelAndViewContainer, NativeWebRequest nativeWebRequest, WebDataBinderFactory webDataBinderFactory) throws Exception {
        HttpServletRequest request = nativeWebRequest.getNativeRequest(HttpServletRequest.class);
        HttpServletResponse response = nativeWebRequest.getNativeResponse(HttpServletResponse.class);
        String ticket = CookieUtil.getCookieValue(request, "userTicket");
        if(StringUtils.isEmpty(ticket)){
            return null;
        }
        return userService.getUserByCookie(ticket,request,response);
    }
}
UserArgumentResolver 组件的作用是在 Spring MVC 请求处理过程中,如果方法参数的类型为 User,它会尝试从 Cookie 中获取 userTicket,并使用该 userTicket 通过 userService 来解析出对应的 User 对象。这样就可以在控制器方法中直接使用 User 对象作为参数,而不需要手动从 request 中获取和解析
登录:
@Service
public class UserServiceImpl extends ServiceImpl<UserMapper, User> implements IUserService {
    @Autowired
    private UserMapper userMapper;
    @Autowired
    private RedisTemplate redisTemplate;
    //登录
    @Override
    public RespBean doLogin(LoginVo loginVo, HttpServletRequest request, HttpServletResponse response) {
        String moblie=loginVo.getMobile();
        String password=loginVo.getPassword();
        /*if(StringUtils.isEmpty(moblie) || StringUtils.isEmpty(password)){
            return RespBean.error(RespBeanEnum.LIGIN_ERROR);
        }
        if(!ValidatorUtil.isMobile(loginVo.getMobile())){
            return RespBean.error(RespBeanEnum.MOBLIE_ERROR);
        }*/
        //根据手机号获取用户
        User user=userMapper.selectById(loginVo.getMobile());
        if(user==null){
            //return RespBean.error(RespBeanEnum.LIGIN_ERROR);
            throw new GlobalException(RespBeanEnum.LIGIN_ERROR);
        }

        //判断密码是否正确
        if(!MD5Util.fromPassToDBPass(password,user.getSault()).
                equals(user.getPassword())){
            //return RespBean.error(RespBeanEnum.LIGIN_ERROR);
            throw new GlobalException(RespBeanEnum.LIGIN_ERROR);
        }

        String ticket = UUIDUtil.uuid();//生成cookie
        redisTemplate.opsForValue().set("user:"+ticket,user);//将用户信息存入到redis里
        //request.getSession().setAttribute(ticket,user);//把cookie和用户对象存到了session里
        CookieUtil.setCookie(request,response,"userTicket",ticket);
        return RespBean.success(ticket);
    }

    @Override
    public User getUserByCookie(String userTicket,HttpServletRequest request,HttpServletResponse response) {
        if(StringUtils.isEmpty(userTicket)){
            return null;
        }
        User user = (User) redisTemplate.opsForValue().get("user:" + userTicket);
        if(user !=null){
            CookieUtil.setCookie(request,response,userTicket,userTicket);
            //重新设置cookie:为了让客户端中的数据和redis缓存中的数据保持一致
        }
        return user;
    }
}
三、秒杀
数据库创建
商品表
CREATE TABLE t_goods(
`id` BIGINT(20) NOT NULL AUTO_INCREMENT COMMENT '商品id',
`goods_name` VARCHAR(16) DEFAULT NULL COMMENT '商品名称',
`goods_title` VARCHAR(64) DEFAULT NULL COMMENT '商品标题',
`goods_img` VARCHAR(64) DEFAULT NULL COMMENT '商品图片',
`goods_detail` LONGTEXT  COMMENT '商品描述',
`goods_price` DECIMAL(10, 2) DEFAULT '0.00' COMMENT '商品价格',
`goods_stock` INT(11) DEFAULT '0' COMMENT '商品库存,-1表示没有限制',
PRIMARY KEY(`id`)
)ENGINE = INNODB AUTO_INCREMENT = 3 DEFAULT CHARSET = utf8mb4;
订单表
CREATE TABLE t_order(
`id` BIGINT(20) NOT NULL AUTO_INCREMENT COMMenT '订单ID',
`user_id` BIGINT(20) DEFAULT NULL COMMENT '用户ID',
`goods_id` BIGINT(20) DEFAULT NULL COMMENT '商品ID',
`delivery_addr_id` BIGINT(20) DEFAULT NULL COMMENT '收货地址ID',
`goods_name` VARCHAR(16) DEFAULT NULL COMMENT '冗余过来的商品名称',
`goods_count` INT(11) DEFAULT '0' COMMENT '商品数量',
`goods_price` DECIMAL(10,2) DEFAULT '0.00' COMMENT'商品单价',
`order_channel` TINYINT(4) DEFAULT NULL COMMENT '1pc,2android,3ios',
`status` TINYINT(4) DEFAULT '0' COMMENT '订单状态,0新建未支付,1已支付,2已发货,3已收货,4已退款,5已完成',
`create_date` datetime default null comment '订单的创建时间',
`pay_date` datetime default null comment '支付时间',
primary key(`id`)
)engine = innodb auto_increment = 12 default charset=utf8mb4;
秒杀商品表
CREATE TABLE t_seckill_goods(
`id` BIGINT(20) not null AUTO_INCREMENT COMMENT '秒杀商品id',
`goods_id` BIGINT(20) DEFAULT NULL COMMENT '商品ID',
`seckill_price` DECIMAL(10,2) DEFAULT '0.00' COMMENT '秒杀价',
`stock_count` INT(10) DEFAULT NULL COMMENT '库存数量',
`start_date` datetime default null comment '秒杀开始时间',
`end_date` datetime default null comment '秒杀结束时间',
primary key (`id`)
)ENGINE = INNODB AUTO_INCREMENT = 3 DEFAULT CHARSET = utf8mb4;
秒杀订单表
CREATE TABLE t_seckill_order(
`id` BIGINT(20) NOT NULL AUTO_INCREMENT COMMENT '秒杀订单id',
`user_id` BIGINT(20) DEFAULT NULL COMMENT '用户ID',
`order_id` BIGINT(20) DEFAULT NULL COMMENT '订单ID',
`goods_id` BIGINT(20) DEFAULT NULL COMMENT '商品ID',
PRIMARY KEY (`id`)
)ENGINE = INNODB AUTO_INCREMENT = 3 DEFAULT CHARSET = utf8mb4;
逆向工程生成各个包
商品列表页需要展示:商品名称,商品图片,商品原价,商品秒杀价,商品库存(秒杀库存),商品详情;
只查询秒杀商品表无法得到最终结果,需要通过id将秒杀商品表和商品表联合进行查询。
我们默认的情况:静态资源是从static里面找的,但是因为既有配置文件又有配置类的情况下,配置类是优先于配置文件加载的
商品列表页
商品详情页
前端传入goodsid,后端写接口接收goodsid,根据goodsid从数据库查询数据:
<td><a th:href="'/goodsDetail.html?goodsId='+${goods.id}">详情</a></td>
秒杀倒计时
<tr>
            <td>秒杀开始时间</td>
            <!--把时间进行格式化-->
            <td th:text="${#dates.format(goods.startDate,'yyyy-MM-dd HH:mm:ss')}"></td>
            <td id="seckillTip">
                <span th:if="${secKillStatus eq 0}">秒杀倒计时:<span th:text="${remainSeconds}"></span>秒</span>
                <span th:if="${secKillStatus eq 1}">秒杀进行中</span>
                <span th:if="${secKillStatus eq 2}">秒杀已结束</span>
            </td>
        </tr>
注解:@PathVariable:将 URL 路径中的动态参数映射到 Controller 方法的参数上
/**
     * public String toDetail(@PathVariable Long GoodsId)表示将URL占位符{goodsId}绑定到方法参数GoodsId上。
     * @PathVariable注解用于告诉Spring MVC从URL路径中提取变量值, 并自动绑定到对应的方法参数上。
     * @param goodsId
     * @return
     */
    @RequestMapping(value="/toDetail/{goodsId}",produces="/text/html;charset=utf-8")
    @ResponseBody
    public String toDetail(Model model,User user,@PathVariable Long goodsId,
                           HttpServletRequest request,HttpServletResponse response){
        ValueOperations valueOperations = redisTemplate.opsForValue();
        String html = (String) valueOperations.get("goodsDetail" + goodsId);
        if(!StringUtils.isEmpty(html)){
            return html;
        }
        model.addAttribute("user",user);
        GoodsVo goods = goodsService.findGoodsVoByGoodsId(goodsId);
        Date startDate = goods.getStartDate();
        Date endDate = goods.getEndDate();
        Date nowDate=new Date();

        int secKillStatus=0;
        //秒杀倒计时
        int remainSeconds=0;
        if(nowDate.before(startDate)){//秒杀还未开始
            remainSeconds =(int)(((startDate.getTime() - nowDate.getTime())/1000));
        }else if(nowDate.after(endDate)){//秒杀已结束
            secKillStatus=2;
            remainSeconds=-1;
        }else{//秒杀进行中
            secKillStatus=1;
            remainSeconds=0;
        }
        model.addAttribute("secKillStatus",secKillStatus);
        model.addAttribute("goods",goods);
        model.addAttribute("remainSeconds",remainSeconds);
        //return "goodsDetail";
        WebContext context = new WebContext(request, response, request.getServletContext(), request.getLocale(), model.asMap());
        //在视图渲染过程中提供上下文信息的一个类
        html= thymeleafViewResolver.getTemplateEngine().process("goodsDetail", context);
        if(!StringUtils.isEmpty(html)){
            valueOperations.set("goodsDetail",html,60, TimeUnit.SECONDS);//把html保存到redis里面
        }
        return html;
    }
前端主动刷新倒计时-goodsDetail.html
<tr>
            <td>秒杀开始时间</td>
            <!--把时间进行格式化-->
            <td th:text="${#dates.format(goods.startDate,'yyyy-MM-dd HH:mm:ss')}"></td>
            <td id="seckillTip">
                <input type="hidden" id="remainSeconds" th:value="${remainSeconds}">
                <!--因为只有状态是0 的时候才能获取到remainSeconds参数,因此需要设置input提前获取remainSeconds,方便为了后面设置按钮的状态-->
                <span th:if="${secKillStatus eq 0}">秒杀倒计时:
                    <span id="countDown" th:text="${remainSeconds}"></span>秒
                </span>
                <span th:if="${secKillStatus eq 1}">秒杀进行中</span>
                <span th:if="${secKillStatus eq 2}">秒杀已结束</span>
            </td>
</tr>
<script>
    $(function () {
        countDown();
    });
    function countDown() {
        var remainSeconds=$("#remainSeconds").val();
        var timeout;
        //秒杀还没有开始
        if(remainSeconds>0){
            timeout=setTimeout(function () {
                $("#countDown").text(remainSeconds-1);
                $("#remainSeconds").val(remainSeconds-1);
                countDown();
            },1000);//秒杀进行中
        }else if(remainSeconds==0){
            if(timeout){
                clearTimeout(timeout);
            }
            $("#seckillTip").html("秒杀进行中");//获取seckillTip元素,设置seckillTip的HTML内容
        }else{
            $("#seckillTip").html("秒杀已经结束");
        }
    };

</script>
秒杀按钮处理
没有开始秒杀和秒杀结束之后,“立即秒杀”的按钮是灰色,秒杀的时候“立即秒杀”的按钮是蓝色
<!--这个表单用于发起一个秒杀请求。当用户点击"立即秒杀"按钮时,
            表单会以POST方式提交到后端的/seckill/doSeckillURL,
            同时会携带一个名为goodsId的隐藏参数,其值来自于goods.id变量,
            后端的控制器可以接收到这个表单提交的请求,并根据goodsId参数执行相应的秒杀逻辑。
            这种通过表单提交的方式可以方便地将前端用户的操作传递给后端进行处理。-->
            <td>
                <form id="secKillForm" method="post" action="/seckill/doSeckill">
                    <input type="hidden" name="goodsId" th:value="${goods.id}">
                    <button class="btn btn-primary btn-block" type="submit" id="buyButton">立即秒杀</button>
                </form>
            </td>
$(function () {
        countDown();
    });
    function countDown() {
        var remainSeconds=$("#remainSeconds").val();
        var timeout;
        //秒杀还没有开始
        if(remainSeconds>0){
            $("#buyButton").attr("disabled",true);//控制按钮的状态
            timeout=setTimeout(function () {
                $("#countDown").text(remainSeconds-1);
                $("#remainSeconds").val(remainSeconds-1);
                countDown();
            },1000);//秒杀进行中
        }else if(remainSeconds==0){
            $("#buyButton").attr("disabled",false);//控制按钮的状态
            if(timeout){
                clearTimeout(timeout);
            }
            $("#seckillTip").html("秒杀进行中");//获取seckillTip元素,设置seckillTip的HTML内容
        }else{
            $("#buyButton").attr("disabled",true);//控制按钮的状态
            $("#seckillTip").html("秒杀已经结束");
        }
    };
秒杀功能实现
是否可以秒杀:1、库存够;2、一个用户只能秒杀一件商品

秒杀前判断:
    1、判断用户是否为空,若为空,返回登录页面;
    2、判断库存是否够,如果不够,跳转到secKillFail页面,并且返回errmsg;
    3、判断是否重复抢购,如果重复抢购,跳转到secKillFail页面,并返回errmsg;
    4、上述都满足,正式秒杀;
public String doSeckill(Model model, User user,Long goodsId){
        if(user==null){
            return "login";
        }
        model.addAttribute("user",user);
        GoodsVo goods = goodsService.findGoodsVoByGoodsId(goodsId);
        //判断库存
        if(goods.getStockCount()<1){
            model.addAttribute("errmsg", RespBeanEnum.EMPTY_STOCK.getMessage());
            return "secKillFail";
        }
        //判断是否重复抢购
        /**
         * getOne()方法来查询数据库中是否存在某个用户的秒杀订单;
         * new QueryWrapper<SeckillOrder>() 创建了一个QueryWrapper对象,用于构建查询条件。
         * QueryWrapper是MyBatis-Plus提供的一个查询构建器工具。
         */
        SeckillOrder seckillOrder = seckillOrderService.getOne(
                new QueryWrapper<SeckillOrder>()
                        .eq("user_id", user.getId())
                        .eq("goods_id", goodsId));
        if(seckillOrder!=null){
            model.addAttribute("errmsg", RespBeanEnum.REPEATE_ERROR.getMessage());
            return "secKillFail";
        }
        Order order=orderService.seckill(user,goods);
        model.addAttribute("order",order);
        model.addAttribute("goods",goods);
        return "orderDetail";
    }
秒杀
 1、将秒杀商品表对应商品库存减一;
 2、生成订单和秒杀订单;
public class OrderServiceImpl extends ServiceImpl<OrderMapper, Order> implements IOrderService {
    /**
     * 秒杀功能的实现:把秒杀商品表对应的商品库存减1;
     * @param user
     * @param goods
     * @return
     */
    @Autowired
    private ISeckillGoodsService seckillGoodsService;
    @Autowired
    private OrderMapper orderMapper;
    @Autowired
    private ISeckillOrderService seckillOrderService;
    @Override
    public Order seckill(User user, GoodsVo goods) {
        SeckillGoods seckillGoods = seckillGoodsService.getOne(
                new QueryWrapper<SeckillGoods>()
                        .eq("goods_id", goods.getId()));
        //把秒杀商品表的库存减一
        seckillGoods.setStockCount(seckillGoods.getStockCount()-1);
        seckillGoodsService.updateById(seckillGoods);
        //生成订单
        Order order = new Order();
        order.setUserId(user.getId());
        order.setGoodsId(goods.getId());
        order.setDeliveryAddrId(0L);
        order.setGoodsName(goods.getGoodsName());
        order.setGoodsCount(1);
        order.setGoodsPrice(seckillGoods.getSeckillPrice());
        order.setOrderChannel(1);
        order.setStatus(0);
        order.setCreateDate(new Date());
        orderMapper.insert(order);
        //生成秒杀订单
        SeckillOrder seckillOrder = new SeckillOrder();
        seckillOrder.setUserId(user.getId());
        seckillOrder.setOrderId(order.getId());
        seckillOrder.setGoodsId(goods.getId());
        seckillOrderService.save(seckillOrder);
        //save(seckillOrder) 方法是 Mybatis-Plus 框架提供的一个保存数据的方法。它会将 seckillOrder 对象中的数据插入到数据库的 seckill_order 表中。
        return order;
    }
}
四、测试
linux服务器安装mysql,将本地数据上传到linux数据库;
将项目打包,发布到linux上,并把jmeter也打包到linux上,通过jmeter在linux上进行压测
打开服务器;
开启redis:cd /usr/local/bin
          redis-server redis.conf
          redis-cli
          auth 123456
连接数据库前:service iptables stop:关闭防火墙
在服务器上运行项目:java -jar seckill-demo-0.0.1-SNAPSHOT.jar
            netstat -alnp | grep 8080:查看8080端口是否被占用
            kill -9 8862:杀死这个进程
运行jmeter:cd /usr/local/apache-jmeter-5.3/bin
           ./jmeter -n -t first.jmx -l result.jtl
           top:查看具体情况
           在linux服务器上生成result.jtl,在windows上查看运行
压力测试:测试并发,并发时,QPS和TPS分别是多少
QPS:Query Per Second每秒的查询率
TPS:Tranction Per Second
配置同一用户测试
名称是:userTicket 值是:cookie的值
05d9449cbf254cb5b54ed6f3d7dbae89
86535d636ca64f4a9a9c65e3a888f862
public class UserController {
    /**
     * 用户信息(测试)
     * @param user
     * @return
     */
    @RequestMapping("/info")
    public RespBean info(User user){
        return RespBean.success(user);
    }
}
配置不同用户测试
config.txt:
商品列表压测结果:
Windows优化前QPS:1332;
Linux优化前QPS:207
秒杀功能压测结果:
使用工具类生成用户UerUtil.java:
package com.xxxx.seckill.utils;

import com.fasterxml.jackson.databind.ObjectMapper;
import com.xxxx.seckill.pojo.User;
import com.xxxx.seckill.vo.RespBean;

import java.awt.dnd.DropTarget;
import java.io.*;
import java.lang.reflect.Array;
import java.net.HttpURLConnection;
import java.net.URL;
import java.net.URLConnection;
import java.sql.Connection;
import java.sql.DriverManager;
import java.sql.PreparedStatement;
import java.sql.Timestamp;
import java.util.ArrayList;
import java.util.Date;
import java.util.List;

public class UserUtil {
    private static void createUser(int count) throws Exception {
        List<User> users=new ArrayList<>();
        for (int i = 0; i < count; i++) {
            User user=new User();
            user.setId(13000000000L+i);
            user.setNickname("user"+i);
            user.setSault("1a2b3c");
            user.setPassword(MD5Util.inputPassToDBPass("123456",user.getSault()));
            user.setLoginCount(1);
            user.setRegisterDate(new Date());
            users.add(user);
        }
        System.out.println("create user");

        //插入数据库
        Connection conn=getConn();//获得与数据库的连接
        String sql="insert into t_user(login_count,nickname,register_date,sault,password,id) values(?,?,?,?,?,?)";
        PreparedStatement pstmt=conn.prepareStatement(sql);
        for (int i = 0; i < users.size(); i++) {
            User user = users.get(i);
            //pstmt.setInt(1,user.getLoginCount()); 等
            //为 PreparedStatement 对象的占位符设置相应的值。第一个参数是占位符的索引(从 1 开始),后面的参数是要设置的值。
            pstmt.setInt(1,user.getLoginCount());
            pstmt.setString(2,user.getNickname());
            pstmt.setTimestamp(3,new Timestamp(user.getRegisterDate().getTime()));
            pstmt.setString(4,user.getSault());
            pstmt.setString(5,user.getPassword());
            pstmt.setLong(6,user.getId());
            pstmt.addBatch();//将当前设置的参数添加到批处理中,等待一起执行
        }
        pstmt.executeBatch();//执行批处理,将所有待插入的用户数据一次性插入到数据库
        pstmt.clearParameters();//清除 PreparedStatement 对象中的所有参数设置
        conn.close();
        System.out.println("insert to db");

        //登录,生成UserTicket,并把ID和userTicket存入到config.txt文件中
        String urlString="http://localhost:8080/login/doLogin";
        File file = new File("D:\\SweetLcXIN\\SMU\\offer\\config.txt");
        if(file.exists()){
            file.delete();
        }
        RandomAccessFile raf=new RandomAccessFile(file,"rw");//RandomAccessFile 对象,用于对一个文件进行读写操作
        raf.seek(0);
        for (int i = 0; i < users.size(); i++) {
            User user = users.get(i);
            URL url = new URL(urlString);
            HttpURLConnection co = ((HttpURLConnection) url.openConnection());//代表了和URL建立的网络连接
            co.setRequestMethod("POST");//连接的请求方法是post
            co.setDoOutput(true);//允许向服务器端输出数据
            OutputStream out = co.getOutputStream();//向服务器端写入数据
            String params="mobile="+user.getId()+"&password="+MD5Util.inputPassToFromPass("123456");
            out.write(params.getBytes());//将上一步构建的参数字符串转换为字节数组,并写入输出流
            out.flush();//刷新输出流,确保所有缓冲的输出字节被写出到底层输出流
            InputStream inputStream = co.getInputStream();//获取服务器返回的输入流
            ByteArrayOutputStream bout = new ByteArrayOutputStream();//缓存服务器返回的数据
            byte[] buff = new byte[1024];
            int len=0;
            while ((len=inputStream.read(buff))>=0){
                bout.write(buff,0,len);
                //输入流中读取数据,
                //并将其写入 ByteArrayOutputStream 对象。
            }
            inputStream.close();
            bout.close();
            String response = new String(bout.toByteArray());//将 ByteArrayOutputStream 中缓存的数据转换为字符串形式的响应结果
            ObjectMapper mapper = new ObjectMapper();//将 JSON 格式的响应数据转换为 Java 对象
            RespBean respBean = mapper.readValue(response, RespBean.class);// 将响应字符串转换为 RespBean 类型的对象
            String userTicket = (String)respBean.getObj();//从 RespBean 对象中获取名为 obj 的字段,并将其转换为字符串类型的 userTicket
            System.out.println("create userTicket:"+user.getId());
            String row = user.getId() + "," + userTicket;//构建了一个包含用户 ID 和 userTicket 的字符串,格式为 "用户ID,userTicket"
            raf.seek(raf.length());//这一行将文件指针移动到文件的末尾
            raf.write(row.getBytes());//将上一步构建的字符串写入文件
            raf.write("\r\n".getBytes());//在写入的字符串后添加一个换行符
            System.out.println("write to file"+user.getId());
        }
        raf.close();
        System.out.println("over");


    }

    private static Connection getConn() throws Exception {
        String url="jdbc:mysql://localhost:3306/seckill?useUnicode=true&characterEncoding=UTF-8&serverTimezone=Asia/Shanghai";
        String username="root";
        String password="123456";
        String driver="com.mysql.cj.jdbc.Driver";
        Class.forName(driver);
        return DriverManager.getConnection(url,username,password);

    }

    public static void main(String[] args) throws Exception {
        createUser(5000);
    }
}
HTTP请求:
用户信息
商品列表
秒杀
问题:秒杀出现了超卖的现象(库存变成负数);速度慢
五、缓存优化
把数据库操作提取出来放到缓存,把频繁会读取,内容变更少的数据放入缓存;
1、页面缓存:前端使用的是themleaf的模板,项目运行时,需要将服务器端的数据全部放到浏览器端展示,数据传输量较大,因此需要放到redis里面做缓存-页面缓存;
2、页面静态化:使用temeleaf模板,传输的时候传输的仍然是一整个模板引擎,因此需要页面静态化,前端就是一个html页面,动态数据才会从服务器发给前端;
页面缓存
针对页面数据较固定的页面
不再直接跳转页面,而是返回页面,把页面放到redis缓存里面
缓存商品列表页
先从redis里面查看是否有该页面,如果有,读取后返回给浏览器;
如果没有,需要手动渲染模板,并存储到redis,将结果输出到浏览器端
@Controller
@RequestMapping("/goods")
public class GoodsController {
    /**
     * 跳转到商品列表页面
     * @param session
     * @param model
     * @param ticket
     * @return
     */
    @Autowired
    private IUserService userService;
    @Autowired
    private IGoodsService goodsService;
    @Autowired
    private RedisTemplate redisTemplate;
    @Autowired
    private ThymeleafViewResolver thymeleafViewResolver;

    @RequestMapping(value="/toList",produces="text/html;charset=utf-8")
    @ResponseBody
    public String toList(Model model,User user,HttpServletResponse response,HttpServletRequest request){
        //从redis中获取页面,如果不空,直接返回页面
        ValueOperations valueOperations = redisTemplate.opsForValue();//ValueOperations 是 Spring Data Redis 提供的一个接口,用于处理 Redis 中的键值对数据
        String html = (String) valueOperations.get("goodsList");//java 中会将 HTML 页面的内容以 String 类型来表示和处理
        if(!StringUtils.isEmpty(html)){
            return html;
        }
        model.addAttribute("user",user);
        model.addAttribute("goodsList",goodsService.findGoodsVo());
        //return "goodsList";
        //如果为空,手动渲染,存入redis
        WebContext context = new WebContext(request, response, request.getServletContext(), request.getLocale(), model.asMap());
        //在视图渲染过程中提供上下文信息的一个类
        html= thymeleafViewResolver.getTemplateEngine().process("goodsList", context);
        if(!StringUtils.isEmpty(html)){
            valueOperations.set("goodsList",html,60, TimeUnit.MINUTES);//把html保存到redis里面
        }
        return html;
    }
    }
}
URL缓存
缓存商品列表页
@RequestMapping(value="/toDetail/{goodsId}",produces="/text/html;charset=utf-8")
    @ResponseBody
    public String toDetail(Model model,User user,@PathVariable Long goodsId,HttpServletRequest request,HttpServletResponse response){
        ValueOperations valueOperations = redisTemplate.opsForValue();
        String html = (String) valueOperations.get("goodsDetail" + goodsId);
        if(!StringUtils.isEmpty(html)){
            return html;
        }
        model.addAttribute("user",user);
        GoodsVo goods = goodsService.findGoodsVoByGoodsId(goodsId);
        Date startDate = goods.getStartDate();
        Date endDate = goods.getEndDate();
        Date nowDate=new Date();

        int secKillStatus=0;
        //秒杀倒计时
        int remainSeconds=0;
        if(nowDate.before(startDate)){//秒杀还未开始
            remainSeconds =(int)(((startDate.getTime() - nowDate.getTime())/1000));
        }else if(nowDate.after(endDate)){//秒杀已结束
            secKillStatus=2;
            remainSeconds=-1;
        }else{//秒杀进行中
            secKillStatus=1;
            remainSeconds=0;
        }
        model.addAttribute("secKillStatus",secKillStatus);
        model.addAttribute("goods",goods);
        model.addAttribute("remainSeconds",remainSeconds);
        //return "goodsDetail";
        WebContext context = new WebContext(request, response, request.getServletContext(), request.getLocale(), model.asMap());
        //在视图渲染过程中提供上下文信息的一个类
        html= thymeleafViewResolver.getTemplateEngine().process("goodsDetail", context);
        if(!StringUtils.isEmpty(html)){
            valueOperations.set("goodsDetail",html,60, TimeUnit.SECONDS);//把html保存到redis里面
        }
        return html;
    }
效果:对于不同的商品id缓存了不同的页面
对象缓存
现在:用户信息是存储在redis里面的,当用户修改密码时,数据库中的数据会发生变化,此时,redis中的数据仍然是旧数据;因此,需要在每一次对数据库进行操作的时候,清空redis,然后将更新后的数据再次写入redis
页面缓存后:
但是,从后端发送到给前端的时候,仍然是缓存整个页面的,数据量还是大的,因此需要将前端不需要变化的页面静态化,需要前后端分离
商品详情页静态化
通过ajax请求接口,接口返回对象,创建一个对象DetailVo,把原来存储在model中的数据存储在DetailVo中
@Data
@AllArgsConstructor
@NoArgsConstructor
public class DetailVo {
    private User user;
    private GoodsVo goodsVo;
    private int secKillStatus;
    private int remainSeconds;
}
@RequestMapping("/toDetail2/{goodsId}")
    @ResponseBody
    public RespBean toDetail2(Model model, User user, @PathVariable Long goodsId){
        GoodsVo goods = goodsService.findGoodsVoByGoodsId(goodsId);
        Date startDate = goods.getStartDate();
        Date endDate = goods.getEndDate();
        Date nowDate=new Date();
        int secKillStatus=0;
        //秒杀倒计时
        int remainSeconds=0;
        if(nowDate.before(startDate)){//秒杀还未开始
            remainSeconds =(int)(((startDate.getTime() - nowDate.getTime())/1000));
        }else if(nowDate.after(endDate)){//秒杀已结束
            secKillStatus=2;
            remainSeconds=-1;
        }else{//秒杀进行中
            secKillStatus=1;
            remainSeconds=0;
        }
        DetailVo detailVo = new DetailVo();
        detailVo.setUser(user);
        detailVo.setGoodsVo(goods);
        detailVo.setSecKillStatus(secKillStatus);
        detailVo.setRemainSeconds(remainSeconds);
        return RespBean.success(detailVo);
    }
秒杀静态化
解决超卖
秒杀时需要更新数据库的库存数量,当更新数据库的时候,需要判断商品库存是否大于0,如果商品库存>0,再进行数据库库存减一;
更新OrderServiceImpl的seckill函数
数据库加唯一索引,防止用户重复购买;
当用户在下面这步同时发送了两个请求,那么判断库存以及判断是否重复抢购都会通过,因此,给用户ID和商品ID同时添加索引,第一个请求进来时会通过,第二个请求进来时索引会进行拦截
把秒杀订单存入Redis中,方便在判断是否重复抢购的时候使用
RabbitMQ
SpringBoot集成RabbitMQ:
1、导入依赖
2、配置RabbitMQ:
3、准备配置类-RabbitMQConfig:
准备一个队列,因为所有的消息最终都会经过队列:
Fanout广播模式:
发送者发送的消息可以被多个队列接收;
不需要处理路由件,速度较快;
创建队列和交换机,将队列绑定到交换机上;
Direct模式:
使用路由key进行相应队列的匹配;
所有发送到Direct交换机的消息(携带路由key)都会被转发到路由key指定的queue;
Direct模式可以使用RabbitMQ自带的交换机
RabbitMQDircetConfig:
发送消息mqSender:
接收消息:
UserController:
Topic模式:
当发送消息过多的时候,Direct模式的路由key会变得很多;
Topic为了方便管理路由key,使用了通配符*(匹配一个词语)和 # (匹配一个或多个词语)
RabbitMQTopicConfig:
发送消息:
接收消息:
UserController:
Headers模式:
RabbitMQHeadersConfig:
发送消息:
(需要绑定头部信息)
接收消息:
UserController:
六、接口优化
1、通过Redis预减库存,减少数据库的访问;
系统初始化时,把商品库存数量加载到redis,当收到请求时,通过Redis预减库存,如果库存不足,直接返回秒杀失败;如果库存足够,先将请求输入消息队列RabbitMQ,立即返回“客户端正在排队中”,异步生成订单,真正减少数据库的库存;针对客户端的页面做一个轮寻,查询是否真正的出了订单,如果有订单,那么秒杀成功;没有订单,秒杀失败;
2、内存标记减少数据库的访问;
3、请求进入队列缓存,异步下单
Redis预减库存
系统初始化时,把商品库存加载到redis里面,当收到请求时,通过Redis预减库存,
如果库存不足,直接返回秒杀失败;
如果库存足够,把请求封装成一个对象发送给RabbitMQ,异步生成订单,前期大量的请求时,可以快速处理,后面消息队列再慢慢处理,可以起到流量削峰的作用,并返回“排队中”;队列中的消息再生成订单,减少数据库中的库存;
客户端做轮寻,判断是否真的秒杀成功。
SecKillController(1)
当库存没有的时候,仍然要和redis进行互动,显然会增加时间,因此可以使用内存进行标记,其中long代表不同的商品ID,Boolean代表是否有库存
RabbitMQ秒杀操作
下单要有用户对象和商品对象,因此需要封装一个发送消息的对象,发送消息的对象有User和Goods
SeckillMessage消息对象
RabbitMQConfig
MQSender
SecKillController(2):快速响应,返回了排队中
MQReceiver
@RabbitListener 是 Spring AMQP 框架中的一个注解,用于标注方法作为 RabbitMQ 消息的消费者。具体来说:标记一个方法为 RabbitMQ 消息的消费者,当指定的 RabbitMQ 消息queue/exchange 有消息到达时,该方法会被自动调用进行消息处理。
下单后,通过客户端轮寻进行是否下单成功的查询
客户端轮寻秒杀结果
之前:秒杀后直接跳转到商品详情页,现在只是返回了“0”,因此需要通过goodsId查询是否订单生成成功
SecKillController(3):获取秒杀结果
判断是否还有库存:
前端:(改:url:”/seckill/result”)
压测:
七、Redis实现分布式锁
但是,如果在删除锁的前一步抛出异常,那么占位就不会被删除,线程就会死在里面,因此可以给线程设置时间
八、安全性,接口优化
安全隐患:点击立即秒杀的按钮,会传递参数给后端,Http是明文传输,会获取秒杀的地址,使得黄牛趁虚而入,给服务器带来很大的压力,因此需要安全优化:
1、隐藏接口地址:秒杀开始时,不会直接允许调秒杀的接口,而是获取秒杀接口的地址,并且这个地址根据不同用户秒杀的不同商品地址是不同的(唯一),别人无法使用该地址进行秒杀,避免大家同时或者提前调秒杀的接口
2、设置验证码:某些人会提前获得获取秒杀地址的接口,然后设备或者脚本就能获取到真正的秒杀地址,此时可以设置复杂验证码(数学公式)过滤掉一部分脚本,同时时间变长,使得服务器的压力不那么大;
3、接口防刷(限流):假设服务器的QPS是200,此时需要限制请求在150 左右,防止服务器崩溃,因此需要限流
1、隐藏秒杀接口地址
获取秒杀路径
根据goodsId和用户生成唯一的地址
SeckillController
OrderServiceImpl
随机的秒杀地址就是在seckill和doSeckill之间加一个随机生成的UUID;
随机生成的接口地址存储在redis中,因为它存在的时间不会太长,1分钟或者30秒后会生成新的随机地址
2、生成验证码
1、防止脚本对于随机地址和秒杀接口地址的快速拼接;
2、拉长时间跨度,降低服务器的压力
验证码接口
秒杀进行中显示验证码,但是秒杀前后把验证码和输入框隐藏
3、校验验证码
点击立即秒杀时校验验证码;
获取秒杀地址的时候,除了传递goodsId,还要传递验证码
controller层:
service层实现校验验证码的方法:
4、简单接口限流
计数器算法:一分钟以内只能访问固定次数,超过固定次数就禁止访问,直到下一分钟开始,计数器归零,重新开始计数
controller层,计数器算法,5秒内点击超过5次,就会返回“访问过于频繁,请稍后重试”:
5、通用接口限流
如果对商品详情设置5秒内访问10次,商品列表设置5秒内访问20次,那么就需要复制上述代码,造成代码冗余,因此,我新定义了一个注解AccessLimit(second=5,maxCount=5,needLogin=true)//访问时间,最大访问次数,是否需要登录
定义注解
在运行时使用,且用在方法上面
九、读写分离,主从复制
MyCat-数据库中间件,连接Java应用程序和数据库
Tomcat:Web中间件,一端连接服务器,一端连接客户端
Mycat: 1、管理多个数据库配置;
2、读写分离;
3、主从复制;“把写数据库的信息全部复制到读数据库中,保持数据一致”;单主单从,双主双从;
4、基本原理:拦截;
Mycat配置:
rule.xml 主要是指定各个表的分片算法
schema.xml 配置多节点的信息
server.xml mycat服务配置,账号密码配置
schemal.xml
server.xml
TESTDB是逻辑库名
启动Mycat:
登录Mycat:
MySQL主从复制:主机只能有一个,从机可以有多个,从接入点开始复制
主机把所有的写操作写到bin log日志里面,从机读取bin log,把bin log写入Relay log(中继日志),写完之后再到从机里面执行。
主机配置:
从机配置:
在主机创建账户并授权slave
查看主机的状态:
position:接入点;需要复制的数据库和不需要复制的数据库
在从机上配置需要复制的主机:
读写分离:
原文链接: https://juejin.cn/post/7377062977646690343
文章收集整理于网络,请勿商用,仅供个人学习使用,如有侵权,请联系作者删除,如若转载,请注明出处:http://www.cxyroad.com/17900.html